Wednesday 30 April 2014

Abstract Nail Art

Hi There 

Today I have done a nail art design using my brand new Red Angel plates that my wonderful cousin brought me all the way from Canada. She brought me them as you can't get them in the UK and believe me I have tried.

So to start these are the things I used

 I used Red Angel plate 114, Revlon Parfumerie Collection in Wintermint which does smell wonderfully minty and finally I used Sinful Colors Black on Black. 

I painted all my nails with the wintermint colour by Revlon


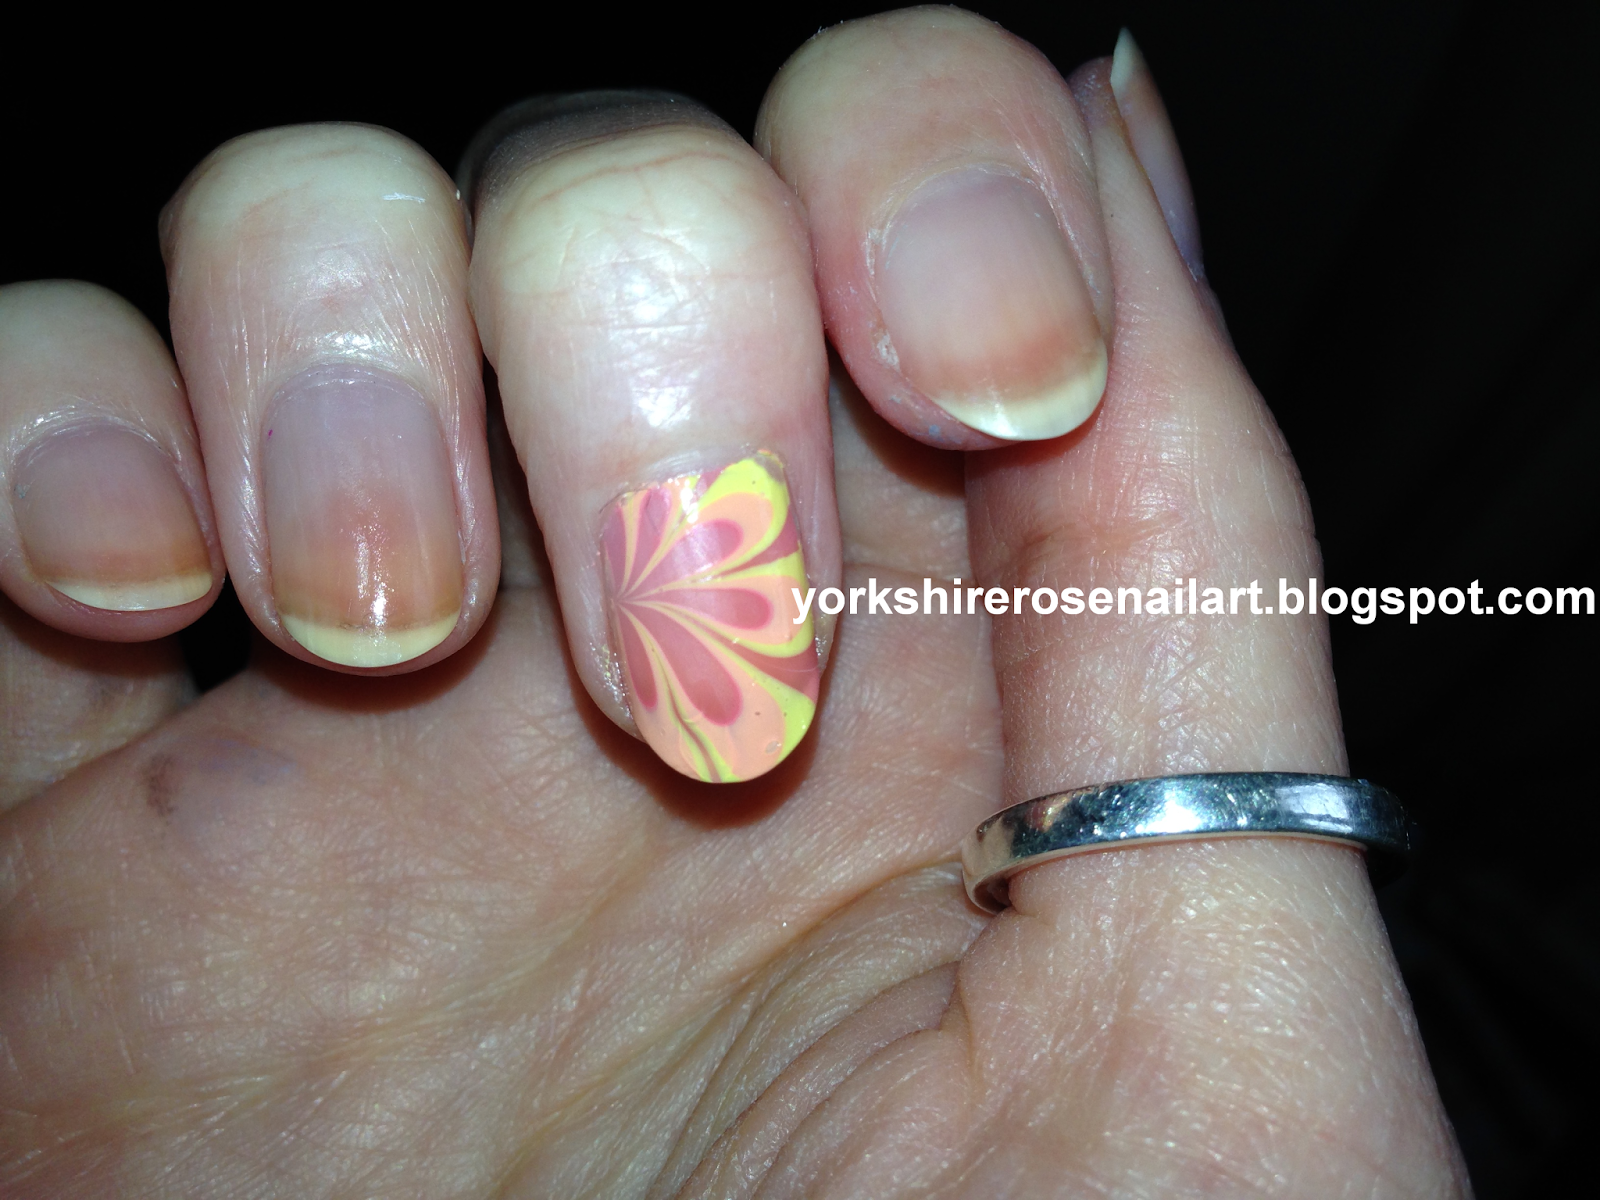
I then took Red Angel Plate RA114 and stamped the bottom left image onto my ring and middle fingers

This is the finished design

 Only a short one today


What do you think


Please leave any questions that you have about this or other mani's I have done in the comments box and I will answer all questions. Do you like this mani please also leave comments below, and if you have any ideas of mani's you would like to see me do in future please also put this in the comments 


Thank you for reading

Yorkshire Rose xx

Monday 28 April 2014

Louis Vuitton Inspired Nails

Hi There

Today I have been inspired by my gorgeous Louis Vuitton handbag

 I have used the following materials

So we have Sally Hansen Insta Dri in Ruby Rush, Sinful Colors in Black On Black and the stamping plate is Handy plate 15 my Mundo De Unas.

I started by painting all my nails in Sally Hansen Insta Dri Ruby Rush


I then took Mundo De Unas Handy plate 15 and stamped the bottom right hand corner full nail image onto my index , ring and little fingers. I then stamped the LV symbol next to the full nail image on my thumb and middle finger using Sinful Colors Black On Black.

This is the finished design


I realise that the stamping isn't very clear so I did my middle and ring fingers in white so you see it better


I prefer the red with black stamping personally as it goes perfectly with my handbag

What do you think


Please leave any questions that you have about this or other mani's I have done in the comments box and I will answer all questions. Do you like this mani please also leave comments below, and if you have any ideas of mani's you would like to see me do in future please also put this in the comments 


Thank you for reading

Yorkshire Rose xx


Saturday 26 April 2014

Zebra Gradient Safari

Hi There

I have had this idea in my head for a while and just had to do it on my nails.

These are the nail polishes and stamps I used

You can't see the first colour on the picture but it Sinful Colors in Black on Black, Nails Inc in Wellington Square (orange), Nails Inc in Notting Hill Carnival (yellow), Models Own in Blueberry Muffin (blue this is also a scented varnish), Barry M Gelly in Prickly Pear (lilac) and Sinful Colors in Snow Me White.

You can't see the plates very well so here is a close up 


 I used Konad plate M57 and used the zebra pattern and I used Mo You London princess collection 04.

I started by painting my nails with my base coat I used as always Sally Hansen As Hard As Nails Strengthener. Followed by 1 coat of Sinful Colors in Snow me White. I then painted the colours above on a sponge starting with orange, yellow ,blue and lilac. I then sponged this onto my nails.

As you can see the gradient isn't very dark so I went over this a couple of times and this is what the finished gradient looks like


If you want you can leave it there or maybe add some glitter. I however wanted to stamp on this and decided to do zebra print so on my thumb, index, middle and little finger I used Konad plate M57 and stamped the zebra print on them using Sinful Colors in Black on Black. On my ring finger I too Mo You London Plate Princess Collection 04 and stamped on the little zebra. 
This is the finished design


What do you think


Please leave any questions that you have about this or other mani's I have done in the comments box and I will answer all questions. Do you like this mani please also leave comments below, and if you have any ideas of mani's you would like to see me do in future please also put this in the comments 


Thank you for reading

Yorkshire Rose xx


Wednesday 23 April 2014

Mickey Mouse Stamping

Hi There

Today I have done a Mickey Mouse inspired nail design. Bare with me as you will need quite alot of stuff

So this is what I used 

The polishes used are Sinful Colors in Snow Me White, Sinful Colors Black on Black and angelica in polka dot. The plates used are LC-18, XY19, Mo You Pro Collection 06 and Mo You Pro Collection 10. All the items were bought off Amazon (UK).

So I painted all my nails white using Sinful Colours Snow Me White


I painted my little finger with 2 coats of Angelica in Polka Dot. I then took plate XY19 and stamped the Mickey Mouse silhouette image onto my ring finger


I then stamped the Mickey Mouse image from the Mo You London Pro Collection 10 onto my index finger


I stamped the I heart Mickey image from the Mo You London Pro Collection Plate 04 on my middle finger and the Mickey and Minnie image from plate LC-18 onto my thumb.
This is the finished design

What do you think


Please leave any questions that you have about this or other mani's I have done in the comments box and I will answer all questions. Do you like this mani please also leave comments below, and if you have any ideas of mani's you would like to see me do in future please also put this in the comments 


Thank you for reading
Yorkshire Rose xx


Sunday 20 April 2014

Bunny Power

Hi There

Today I have done a bunny themed Easter Manicure

Here is an image of the things I used


 I used Sinful Colors Black on Black, Sinful Colors Snow Me White and Sinful Colors Glass Pink. I also used image plate Mo You London Princess Collection 09

I painted my nails with my usual base coat Sally Hansen Advanced Hard As Nails Strengthener and followed that with 2 coats of Sinful Colors Glass Pink

I took image plate Mo You London Princess Collection 09 and stamped the bunny image in Sinful Colors Black On Black. I coloured in the bunny with Sinful Colors Snow Me White and when the polish was tacky stamped the image on my thumb and ring finger. As the image was too large for my ring finger I had to shrink the image by stretching my stamper when picking up the image

This is the finished design


 Only a short one today


What do you think


Please leave any questions that you have about this or other mani's I have done in the comments box and I will answer all questions. Do you like this mani please also leave comments below, and if you have any ideas of mani's you would like to see me do in future please also put this in the comments 


Thank you for reading
Yorkshire Rose xx

Saturday 19 April 2014

Grab Yourself An Easter Egg

Hi There and Happy Easter

Today my mani is Easter based 

These are the things I used


The colours used are Sinful Colors in Snow Me White, Sinful Colors Black on Black, Illamsqua in Scarce (pink), Speckle (lilac), Fragile (blue), Mottle (green), Freckle (brown).

I started with my usual base coat Sally Hansen Advanced Hard As Nails Strengthener. I then painted my thumb pink, my index finger lilac and my little finger blue. I painted my ring and middle fingers white

I then took bundle monster H10 and stamped it using Sinful Colors Black on Black and then turned it into a decal using the above colours to fill it in. Then when the nail varnish had gone tacky I stamped the design onto the ring finger and middle finger
This is the finished design


What do you think


Please leave any questions that you have about this or other mani's I have done in the comments box and I will answer all questions. Do you like this mani please also leave comments below, and if you have any ideas of mani's you would like to see me do in future please also put this in the comments 


Thank you for reading
Yorkshire Rose xx


Wednesday 16 April 2014

Apricot Swirls Stamping

Hi There

I bought some new nail varnishes at the weekend and I thought I would try them out. They are by Revlon and they are part of their new scented Parfumerie collection.


The colours I bought were Moonlit Woods (purple), Wintermint (green sparkly), Apricot Nectar (peach), Italian Leather (grey), Fresh Linen (ivory) and Pink Pineapple (pink). All the colours are scented and I picked Apricot Nectar to test.

This is the plate and polishes that I used

The polishes are Sinful Colors in Black on Black and Revlon in Apricot Nectar, the plate is Bundle Monster BM04


I painted my nails with my usual base coat Sally Hansen Advanced Hard As Nails Strengthener. Followed by 2 coats of Revlon's Apricot Nectar (you could get away with 1 coat but it was slightly streaky)


I really liked the smell and the colour and didn't want to cover the whole polish with a full nail design so I picked the flowery swirly pattern on bundle Monster Plate BM04.

This is the finished design


If you wanted you could add glitter to this design but I like it as it is 


What do you think


Please leave any questions that you have about this or other mani's I have done in the comments box and I will answer all questions. Do you like this mani please also leave comments below, and if you have any ideas of mani's you would like to see me do in future please also put this in the comments 


Thank you for reading
Yorkshire Rose xx


Sunday 13 April 2014

Feather Nails

Hi There

Today I am doing a review of a product that I saw and bought in Primark, it is called Feather Manicure.

There are 2 different colours and they are £3 each. The idea of them is to have actual feathers on your nails.

So lets get started. This is what they look like packaged

As you can see there is a nude coloured nail varnish with white and brown feathers and in the other pack a silver polish and pink and black feathers.

This is what you actually get in the set

So you get a base coat, a top coat, a selection of feathers, 2 orange sticks, a nail file and some nail scissors.

Now the test so you start with your usual base coat as usual I used Sally Hansen As Hard as Nails Strengthener. Then you add 2 coats of the nail colour. I thought the nail varnish was a bit gloopy and you really need 3 coats to make the varnish fully opaque. (sorry for the mess on the thumb)


When this is fully dry you paint on a layer of the top coat which is supplied and stick your selected feather onto it. When this is dry you need to trim around the nail using the scissors provided. You then add another coat of top coat going in the same direction as the grain of the feather. When dry you can now file off the edges of the feather to make it tidy.

This is the finished look


My overall thoughts. The nail varnish is a bit gloopy and the top coat takes ages to dry ( I left it to dry for over 1 hour went to bed and it still smudged). I do like the unusual idea of having feathers on your nails though and it might be nice to stamp birds on the other nails. The nail varnish colours are very pretty also and the patterns on the feathers are very nice. When you are ready for a change the feathers and varnish come of easily aswell . So for the price I think this is a good product and its worth a try. If you have seen this product and were wondering whether or not to buy it I hope this review has helped 

Thank you for reading 

Yorkshire Rose xx
 

Saturday 12 April 2014

Ice Queen

Hi There

Today I have done a stamping decal. Let's get straight to it

These are the polishes that I used and the plate

I used Pueen Plate 70 and the polishes I used are Nails Inc Cambridge Terrace (silver) Sinful Colors Black On Black, Sinful Colors Snow Me White, Sinful Colors Cinderella (pale blue shimmer) and Nails Inc Greenwich Park(silver fine glitter)

I painted all my nails with Nails Inc Cambridge Terrace


I then took my Pueen 70 plate and stamped the image of the girls head using Sinful Colours Black On Black to stamp


I then coloured in the image I used Sinful Colors in Cinderella for her eyes, Sinful Colours Snow me White for her face as she is the ice queen and I used Nails Inc Greenwich Park for her hair. I then waited until the design was tacky and stamped it onto my nail. I quickly stamped some flowers on my other nails from the same plate using Sinful Colors in Black On Black

This is the finished design

 What do you think


Please leave any questions that you have about this or other mani's I have done in the comments box and I will answer all questions. Do you like this mani please also leave comments below, and if you have any ideas of mani's you would like to see me do in future please also put this in the comments 


Thank you for reading

Yorkshire Rose xx


Wednesday 9 April 2014

Muli Coloured Flowers Nail Decal and Stamping

Hi There

First thing I would like to say is this isn't my idea it came from a You Tube video by Swanette Swan. I have tried nail decals before and when I place them on my nail I seem to smudge the image or the polish underneath. So now thanks to Swanette Swan I have managed to do this design and not smudge anything.(This design is my original design Swanette Swan used dinosaurs in her design)

So here we go these are the polishes and stamping plates I used. 

So I have used Konad Plate M51 and Bundle Monster Plate BM-301. The colours that I have used are Nails Inc in Green Park (green) Sinful Colors in Let's Meet (yellow) Barry M in Blossom (pink), Sinful Colors  in Snow Me White (white), NYC in Battery Park Purple (purple) and last but not least Sinful Colors in Black On Black.

Before we get started I want to apologise as I have only done 1 finger I was just experimenting

So I started by painting my nail with Nails Inc Green Park

I put a layer of top coat over this just in case the stamping went wrong I could remove the stamping and not damage the base colour. 
I then stamped the stripey pattern on Bundle Monster Plate BM-301 and stamped it using Sinful Colors Snow Me White. Sorry forgot to take a picture of this step:(

Whilst the nails were drying I started to make the decal. I used the long flower image from Konad Plate M51 and stamped using Sinful Colors in Black on Black and I left this on the stamper. I took a detail brush and coloured in the flowers using Sinful Colors Let's Meet, Barry M Silk Collection in Blossom and NYC in Battery Park Purple. Whilst the decal was still tacky I pressed the image onto my nail quite firmly making sure that the image was sticking which it was and this is the finished design

 When I do this type of design again the only thing I would do differently is do a few more layers of the nail varnish so that the decal was opaque as you can see some of the nail varnish below through the design, but we stamp and learn as we go along

 What do you think


Please leave any questions that you have about this or other mani's I have done in the comments box and I will answer all questions. Do you like this mani please also leave comments below, and if you have any ideas of mani's you would like to see me do in future please also put this in the comments 


Thank you for reading

Yorkshire Rose xx

Sunday 6 April 2014

Glow In The Dark Neon Polish And Stamping

Hi There

So I went on a shopping trip in town and popped into Primark beacuse my sister had seen some new glow in the dark polishes, they were only £1.50 each so I thought what the heck I might as well try them so here is my design.

The polishes


I painted my helper finger in the pink colour unfortunately the varnishes don't have names

I then stamped on the nail using Konad Plate M98 and this design


The colour I used to stamp was Black on Black by Sinful Colors. 
This is the finished design

I  did the same design in the yellow


I also bought a glow in the dark top coat so if you don't like neons or you don't like the colours of the other glow in the dark varnishes you can just buy the topcoat and use any colours that you want underneath.

Anyhow I think my favouite of the two is the pink. I tried to take pictures of them in the dark but the camera isn't picking it up but believe me they do glow

What do you think


Please leave any questions that you have about this or other mani's I have done in the comments box and I will answer all questions. Do you like this mani please also leave comments below, and if you have any ideas of mani's you would like to see me do in future please also put this in the comments 


Thank you for reading

Yorkshire Rose xx


Saturday 5 April 2014

60's Water Marble And Lace Design

Hi There

I was just messing about with my polishes and a few grabbed my eye so I would do a water marble. I then thought wouldn't it be nice to stamp over the marble and decided to make it look like lacey material as I love to make my own clothes.

The polishes and plate I used are

The polishes are Nails Inc in Notting Hill Carnival (yellow), Wellington Square (orange) and Sloane Avenue (pink). The plate is Konad M57.

So I covered my finger in masking tape not including my nail, this makes the clean up easier.
I created a marble design in my plastic cup by alternating the 3 colours yellow then orange then pink. I made a pattern using a cocktail stick (you can use this or an orange stick would do. I then dipped my finger in the water placing my nail over the polish and used a cotton bud to remove the rest of the polish. It looked like this


I apologise for the short nails they have only just grown back after I broke 2 really low down (ouch). I have being using my helpful fake finger but I just can't seem to get the stamping where I want it so I have decided to just use my natural nails again although the fake finger might make an appearance now and again. Anyway back to the stamping

I took Konad Plate M57 and used the lace design in the bottom left corner and stamped this over my nail using Sinful Colors Black on Black

This is the finished design


What do you think? sorry not all of my nails are painted.


Please leave any questions that you have about this or other mani's I have done in the comments box and I will answer all questions. Do you like this mani please also leave comments below, and if you have any ideas of mani's you would like to see me do in future please also put this in the comments 


Thank you for reading

Yorkshire Rose xx


Wednesday 2 April 2014

Pink Flowes Water Marble and Stamping

Hi There

I really wanted to do a water marble today so I did, again I will be using my faithful assistant the fake finger ( I need to give her a name I suppose any suggestions?)

So I took a plastic cup and filled it with water. I used Sinful Colors Snow Me White and Sally Hansen Insta Dri in Presto Pink to make my pattern and then placed my nail in the water. I removed the rest of the nail varnish in the water so as not to smudge my design and then removed the nail this is the result

As I wanted to carry on playing I added a layer of glitter polish which is OMG by exposed (I know I'd never heard of it either) and a pink rhinestone

I still thought it needed something extra so I took my Mo You Salon Pro Plate III and this image

I stamped this image on the bottom corner using Sally Hansen Insta Dri in Quick Brick

This is the finished design


What do you think 

Please leave any questions that you have about this or other mani's I have done in the comments box and I will answer all questions. Do you like this mani please also leave comments below, and if you have any ideas of mani's you would like to see me do in future please also put this in the comments 


Thank you for reading

Yorkshire Rose xx